


This utility creates the shortest route between two or more points on the network.
To start using this tool the first thing to do is to load a line shapefile with a network topology.
If the network topology has already been created for this layer then select Network|Load topology from previously generated network from the menu, or else select Network|Generate network topology if the topology has not yet been generated.
Once the topology has been loaded, tools for inserting stops and barriers on the network are enabled on the Network toolbar.
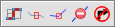
Network extension toolbar
Stops on the route can be inserted in two ways, either onto a segment or onto a node. To insert a stop along a segment or section of the network click the Put flag on a section tool on the toolbar.

Put flag on a section
This tools allows stops to be inserted along any section of the network.
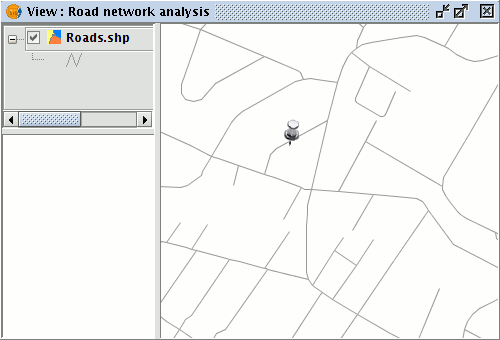
Pushpin symbol representing a stop/flag on a section
To insert a stop at a node click the Put flag on a node tool.

Put flag on a node
This tool will insert a stop at the node closest to the location clicked in the View.
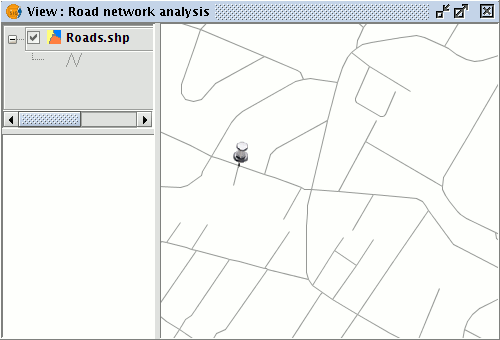
Pushpin symbol representing a stop/flag on a node
Select the appropriate insert tool and in the View click the locations where stops are to be inserted. These stops will form the route. When all the stops have been inserted click the Shortest path button,

Icon for calculating the shortest path
or select Network|Shortest path from the menu.
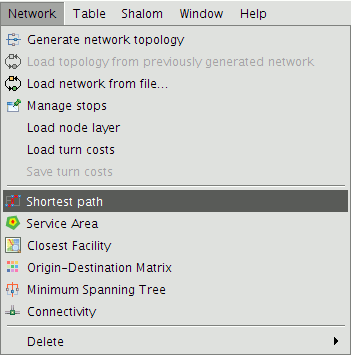
Shortest path option on the Network menu
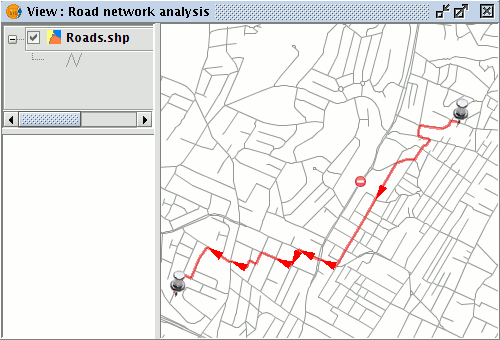
A shortest route based on the defined topology will be generated.

Result of the shortest path calculation with the path shown in red
It is also possible to insert barriers or closures on the network by making use of the Put barrier tool on the Network toolbar.

Put a barrier on the network
Select the tool and place barriers at the desired locations. If the route is recalculated these barriers will be taken into account and the shortest path will be routed around them.
Result of the new route, taking barriers into account
Note: Remember that routes and stops should be saved if they are to be used in future gvSIG sessions. Select Network|Manage stops to open the Route control panel and then click the Save stops and/or Save route buttons to do this.


